Help System
 |
Help System |
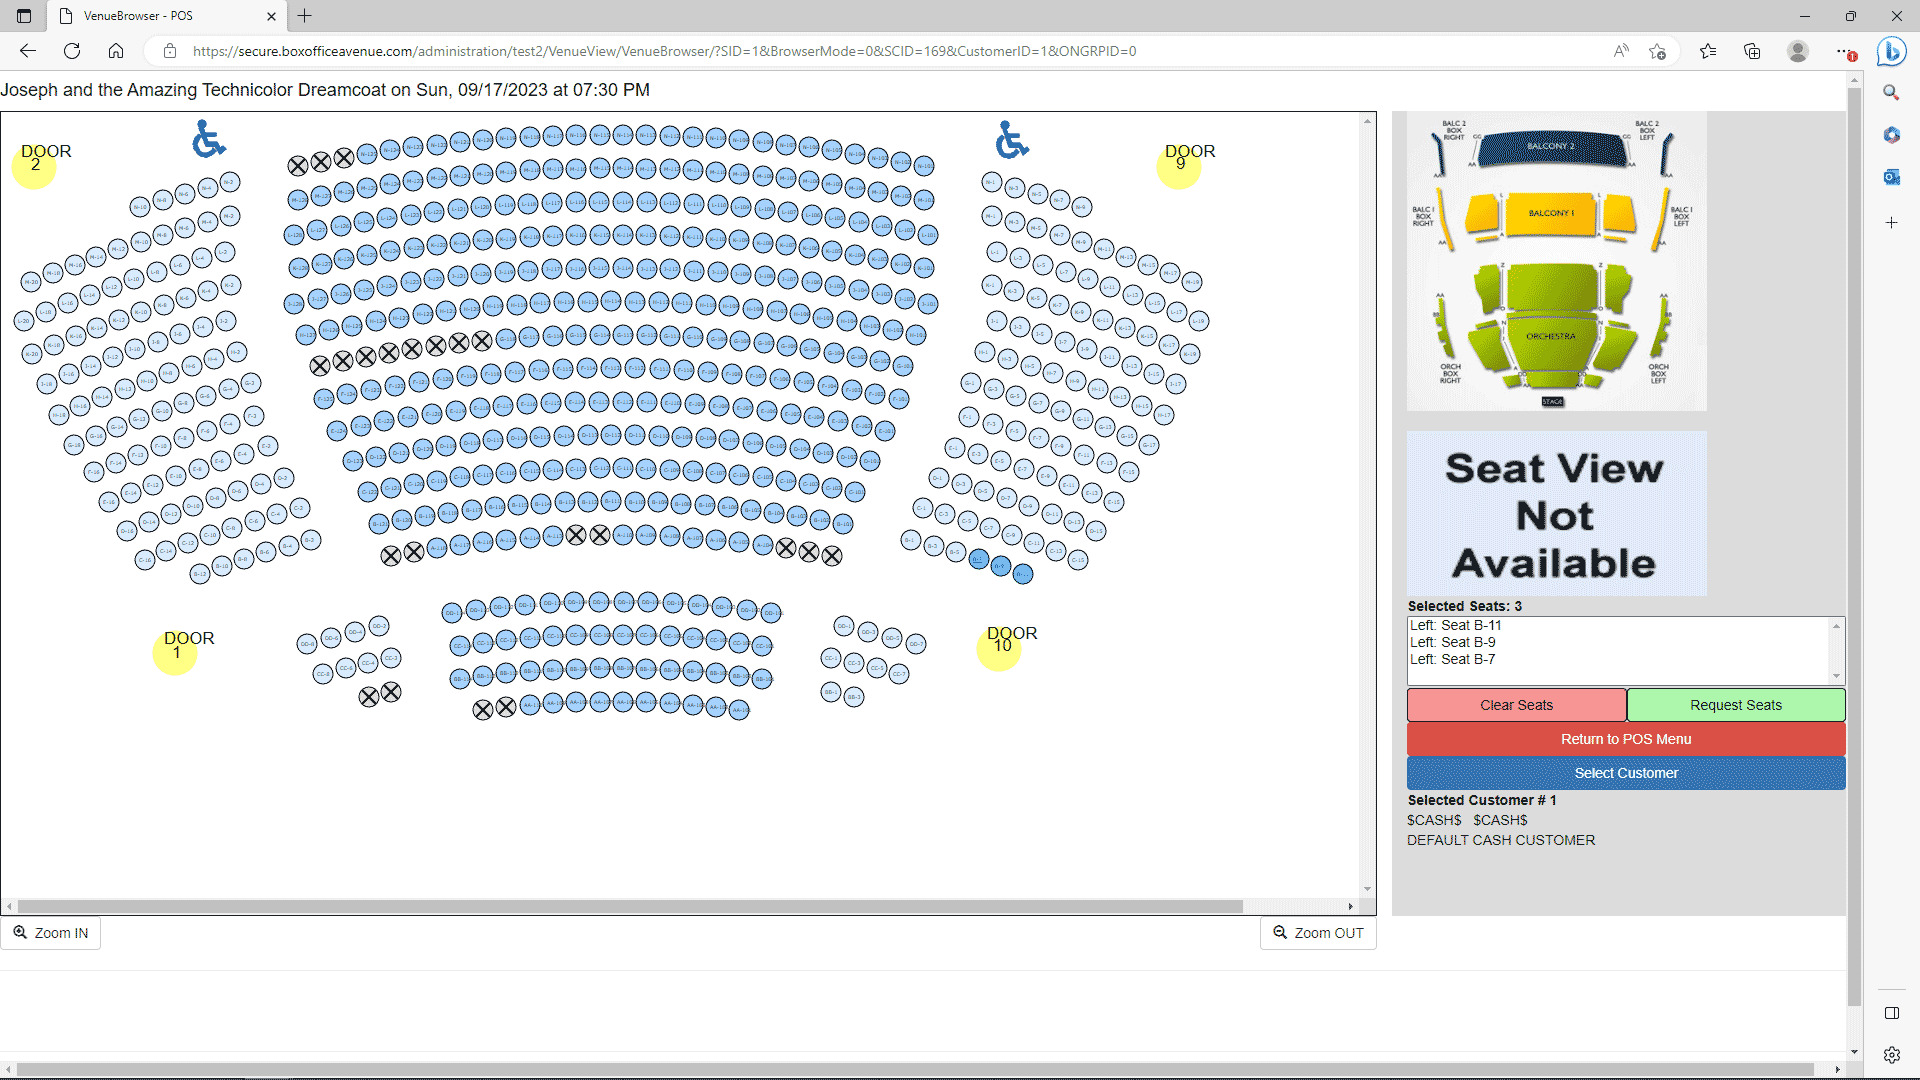
The Venue Browser is the principle way you navigate through the available seats for any scheduled attraction. Here is an illustration of the Venue Browser (shrunk in size to fit in the help screens better):

The Venue Browser will have somewhat different button options presented, depending upon whether you are viewing a venue in the POS Module or through the ADMIN Attraction Record forms. This illustration is an example of how the Venue Browser appears in the POS Module.
The SELECT CUSTOMER button will allow you to select the customer being acted upon, by invoking a CUSTOMER SEARCH.
The CLEAR SEATS button will clear any seats you have selected during this browser session.
The REQUEST SEATS button will invoke the selector to assign ticket types.
The RETURN TO POS button appears during POS Sessions, and clicking this indicates you are done selecting seats and would like to return to the Main POS Menu Screen.
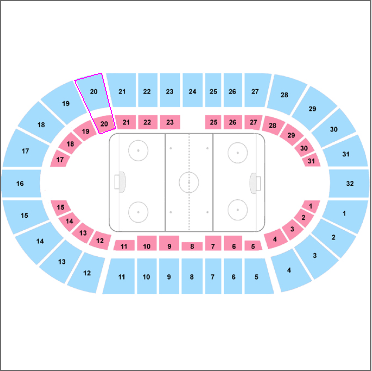
The GRAPHIC OVERVIEW provide a Main Seating Chart Display for navigating venues with multiple display quadrants.

In the example above, the option to show hot spots is selected, and we can see that SECTION 20 is currently being displayed. Clicking on any available area will navigate to that portion of your venue.
If your current operation supports it, you will see a list of seats that you have selected, along with their selected attributes.
See Also:
Assigning Ticket
Types to Seats
Assigning Hold
Types to Seats
Quick Seat Statistics