
Help System
|
|
Help System |
Tick-It! Trak Pro allows you to create usable Venues by importing your existing venue from Center Stage Software's venerable old program, WinTix. This will enable users that are upgrading from this competitor's software to seamlessly migrate to Trak Pro. Now, WinTix keeps seating diagram information in FOXPRO Database files with an extension of .PLN. These older venue information formats are much simpler, and contain a great deal less information than Trak Pro venues. For example, all PLN files restrict venues to have straight, orthogonal rows of seats. PLN files do not contain any 3 dimensional information, they are strictly "flat". PLN files only define seat sections, and do not have seat types or cost categories. PLN files contain seating information only, and do not have any "graphic overviews". Also, there is no name and address information in WinTix PLN files. Additionally, a single seating diagram for a venue might span several PLN files.
To best mimic what you are already used to seeing in WinTix each PLN will be imported as a "Display Quadrant". The computer will "render" the diagram for each PLN, and use that as a "Graphic Overview" for the quadrant. You will probably want to use a graphics editor and detail a new graphic overview, but what is produced by the import routine will work to get you started.
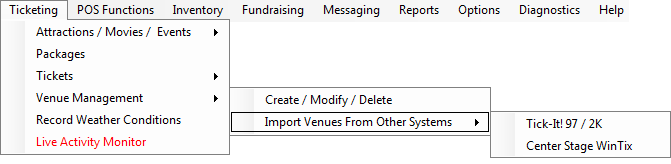
From the TICKETING menu, select VENUE MANAGEMENT then IMPORT VENUES FROM OTHER SYSTEMS then CENTER STAGE WINTIX:
You will be presented with a dialog window as shown here:
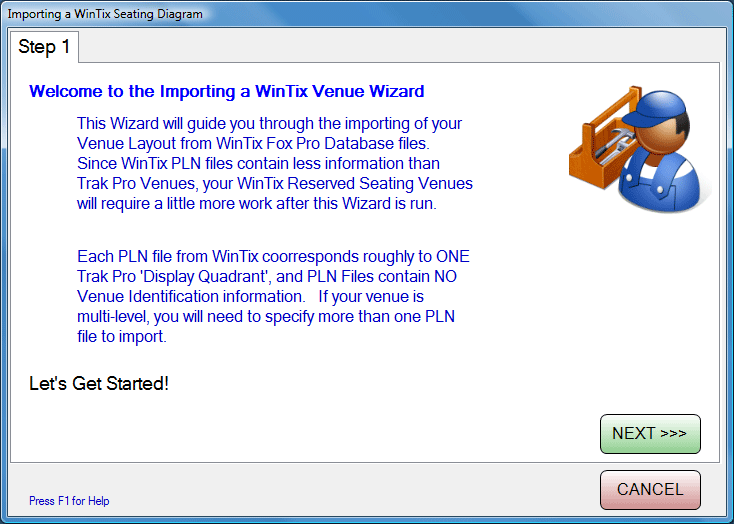
Click NEXT to start your import procedure:
Since PLN files contain no name and address information, you will have to supply that here. Also, you will have to select a VENUE TYPE, SEAT TYPE and COST CATEGORY to use while importing.
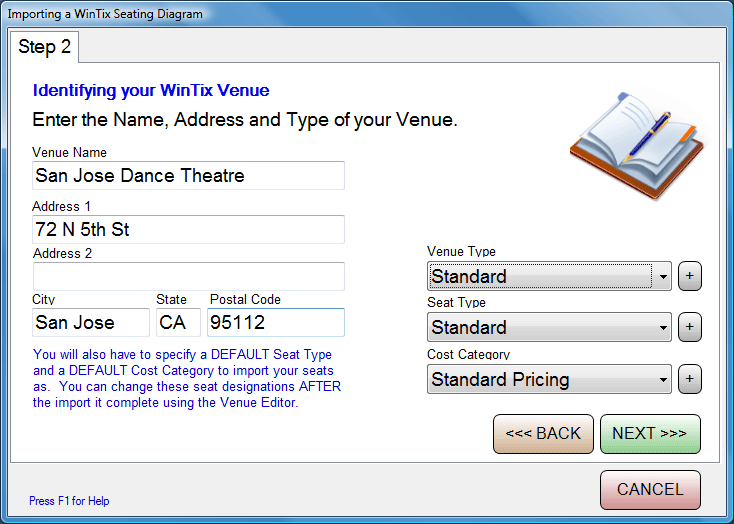
In this example, we are importing a venue for the San Jose Dance Theatre. Click the NEXT to continue.
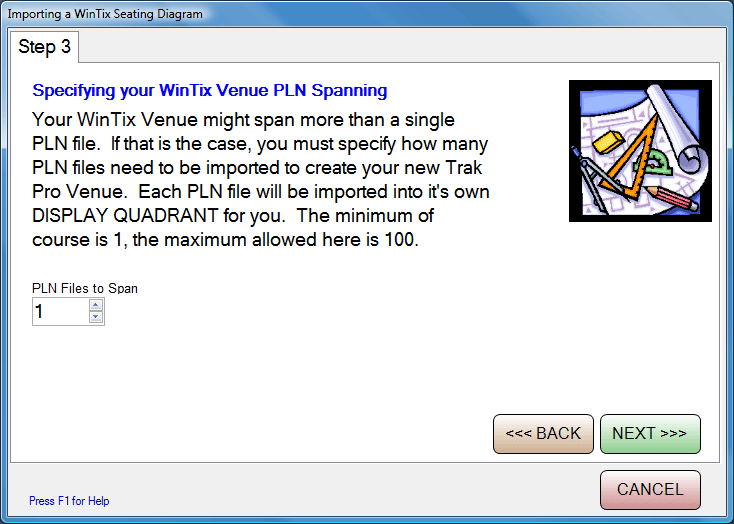
Since WinTix venues can span more than one PLN file, you will have to tell Trak Pro just how many PLN files are to be used for the venue you are importing. In the example above, we are just using 1. Click NEXT to continue:
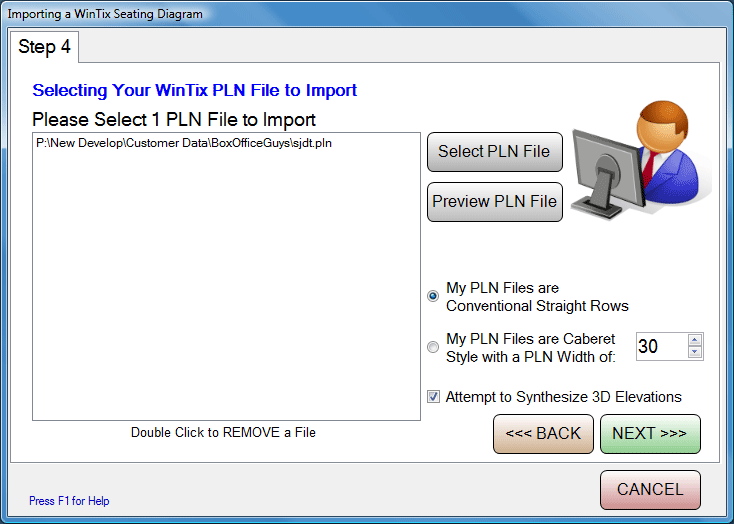
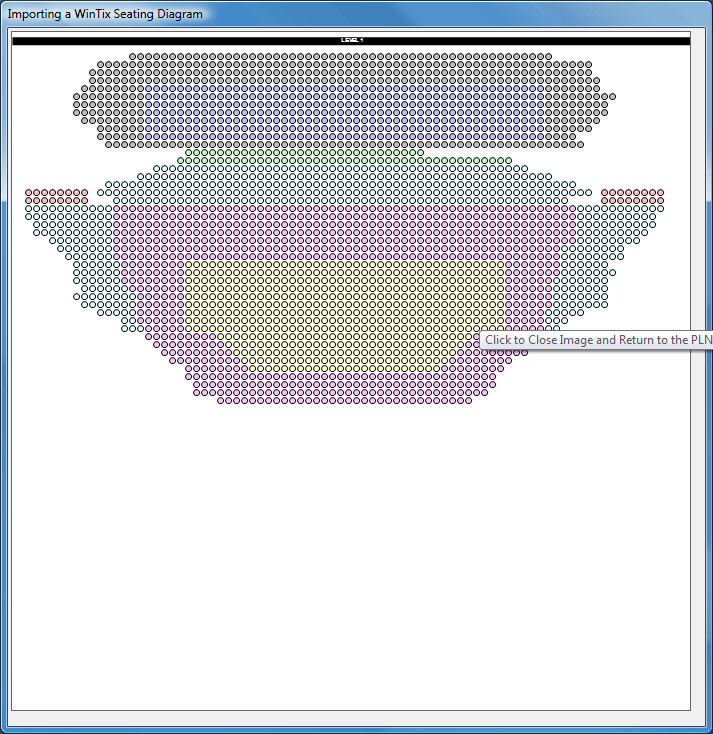
Click.on the SELECT PLN FILE button to browse your folders for PLN files. You can select as many PLN files are you require for importing. In the example above, just the SJDT.PLN file has been selected. You may also select whether or not your PLN is a "conventional" auditorium style layout with straight rows, or if it is a "caberet" style with table seating. If you choose "caberet", then you MUST provide the proper WIDTH of the PLN, as Trak Pro cannot figure this out from the information given in the PLN file. You can click on the PLN file name in the list, then click on the PREVIEW PLN FILE button to see a preview of how Trak Pro has interpreted your PLN file information:
Click NEXT:

Click the FINISH button to begin importing your PLN file(s). You will see a progress bar like this one:
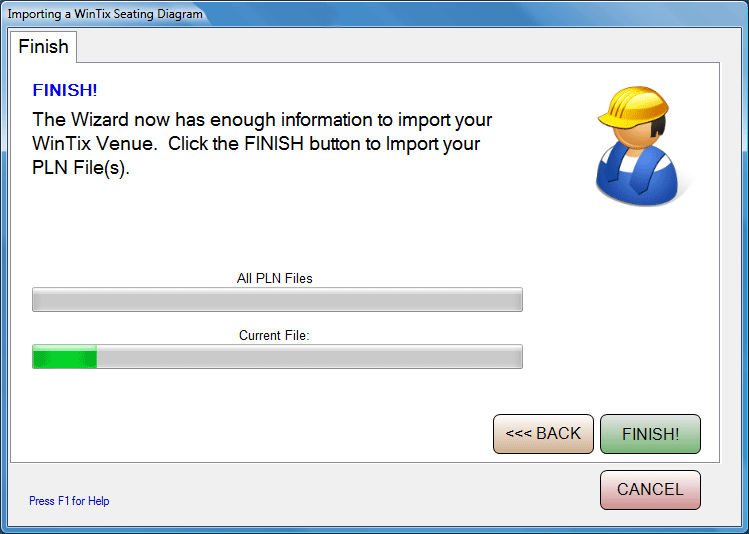
When completed, you will be taken to the VENUE BUILDER to complete any "final touches" on your newly imported PLN file(s).
See Also:
Venue Builder
Graphic Overviews
Seating Display Quadrants
Helper Applications
Importing WinTix
Customers
Importing Venues from
Tick-It! 97/2K