Help System
 |
Help System |

 |
Returns Processed in the
POS Module are handled on a TRANSACTION
basis. This means that in order to RETURN any items from a
previous transaction, you MUST HAVE THE TRANSACTION NUMBER
AVAILABLE. Usually, this means that the customer is
required to bring in his or her receipt in order to have a return
processed, and this is not an uncommon policy. For customers with
unique records, you can look up a customer history to find transaction
numbers as a courtesy, should the customer have forgotten their receipt.
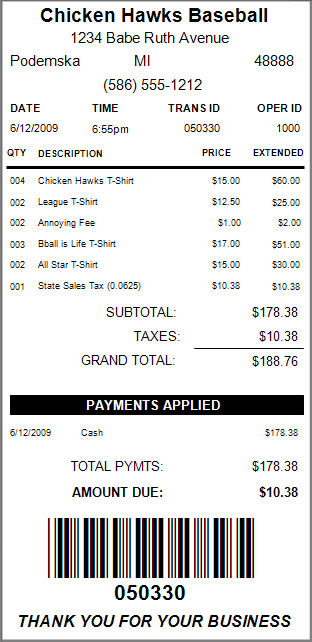
The best way to learn how to process a return is with an example: Pictured on the left is an example Receipt for Transaction #50330 from the Chicken Hawks Baseball Club. In fact, this receipt was generated using the default failsafe format built into Trak Pro. You can tell it is Transaction 50330 in three places: It says it near the top, between TIME and OPERATOR. It says it in large numbers at the bottom. It has a large barcode we could scan. We see that the customer has purchased quite a few souvenir tee shirts, to the tune of $178.38. He complains that one of the LEAGUE tee shirts is stained, and since we have no others in his size, he wants a refund. He also states that his cousin's sister's boyfriend's mother in law cannot wear one of the All Star shirts, because it is the wrong size, and he wants to return that also. Since the customer is ALWAYS RIGHT, we process his return at the POS Station right away... |
First we click on the MANAGER FUNCTIONS button on the POS Control Panel.

This will bring up the Managers Functions Panel:

Click on the PROCESS RETURN on the far right:

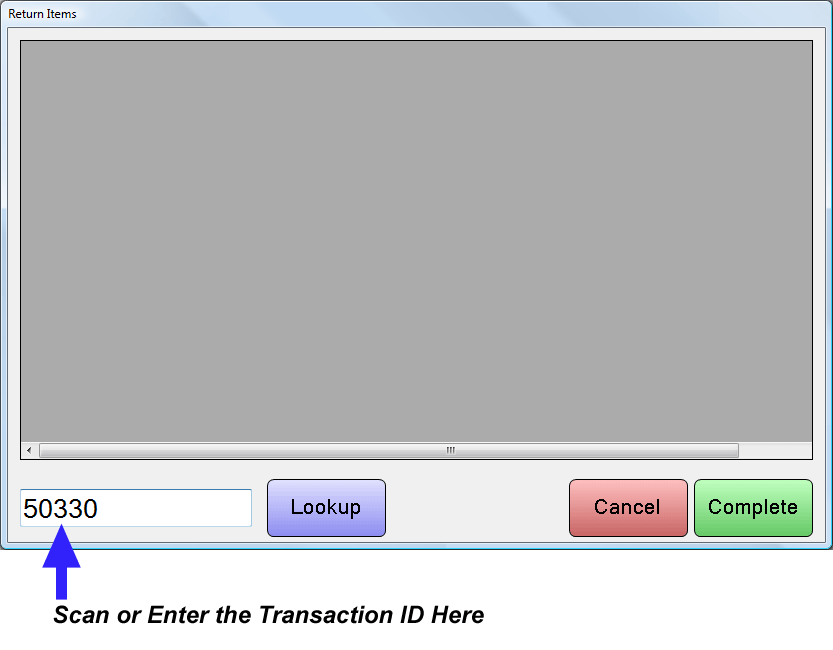
This will invoke the RETURN SCREEN (which has been selectively compressed to better fit in the HELP screen):

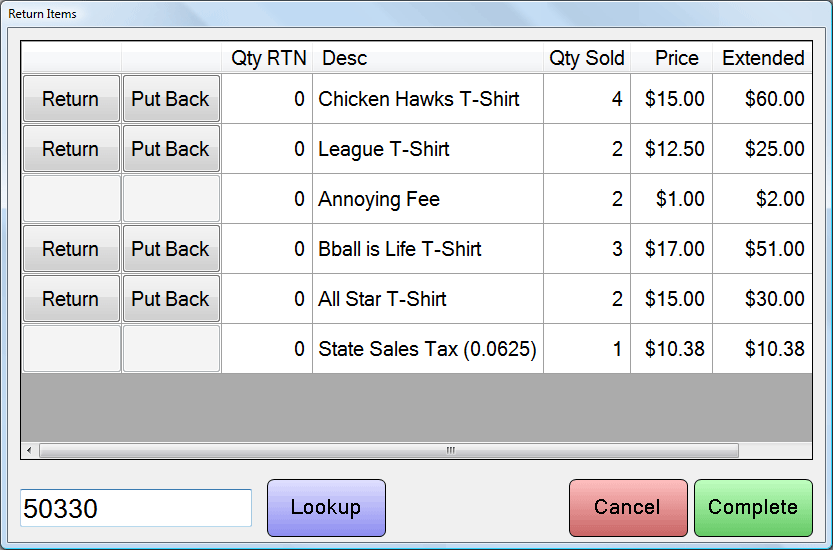
The Return Screen is set up to take advantage of Receipts that have their ID's set in Bar Code. If your Receipts are not bar coded, they should be! If not, just type in the Transaction ID the old fashioned way. The details for that transaction will appear in a manner like this:

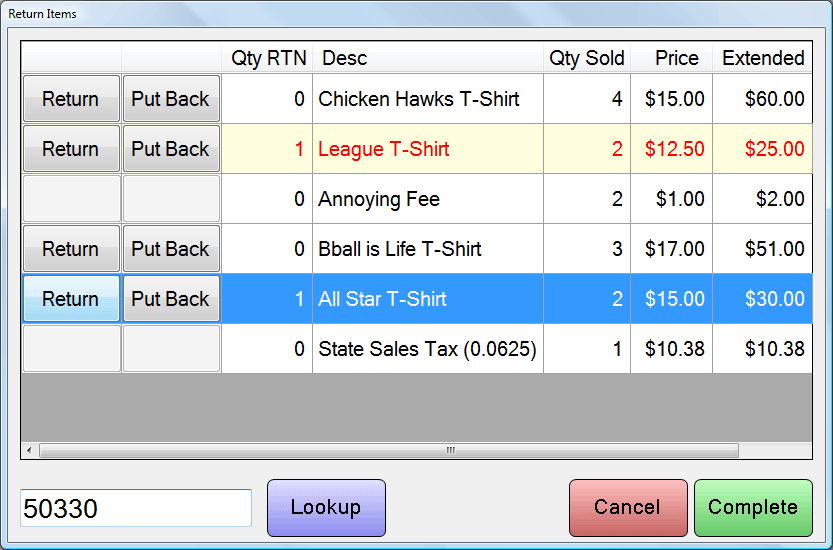
For each item you wish to return, click the RETURN button:
![]()
This will increment the QTY RETURN column by 1. You cannot return MORE than were purchased. Click as many times as you need to to return the desired quantity. If you make a mistake, you can click on the PUT BACK button. In this example we are going to click just one time on the LEAGUE T-SHIRT and the ALL STAR T-SHIRT.
Notice that there are two line items that DO NOT have buttons for returning. They are the TAXES, and an ANNOYING FEE. We will take a moment to explain why we included them in this example:
Taxes are re-calculated by the Shopping Cart. Operators need only deal with ITEMS, TICKETS and SERVICES. Taxes are computed automatically as configured by the ADMIN. There will never be a need to "return" taxes like you would an item. Just select the ITEMS you are returning and the Shopping Cart will compute how much in taxes are going back.
Fees are another thing altogether. There are fees that an Operator can select like an item all by themselves, such as a HANDLING FEE for the entire transaction. These fees behave like regular items, if they are entered in the Transaction that way. Then there are other fees, which are SUBORDINATE to some other item. For example, a ticket might have a fee tacked on for HISTORICAL PRESERVATION, or some such. The fee is ONLY added when a TICKET is sold, and is done so AUTOMATICALLY based on the configuration of such fees by the ADMIN. In our T-Shirt example below, our small "Triple B" Baseball League has deemed that all merchandise bearing LEAGUE logos MUST have a 1 dollar league image use fee, which our ADMIN has configured as the "Annoying Fee". This fee is AUTOMATICALLY generated when the sale of a LEAGUE T-SHIRT takes place. Some fees are tagged as REFUNDABLE, while others are NOT. In this case, clicking on the RETURN button for the LEAGUE T-SHIRT will cause the Shopping Cart to process the ANNOYING FEE, and refund it or not, depending upon how it was set up in the ADMIN.

When you have selected all the items you wish to return, click the COMPLETE button:

The items to return are entered into your Shopping Cart. Click the CLOSE MANAGER FUNCTIONS button:

At this point, you could continue to SELL the customer additional items, as Trak Pro allows you to conduct SALES and RETURNS during a SINGLE transaction. When you have taken care of ALL the customer's needs, click the CHECK OUT button.
See Also:
Main POS Help
Voiding Transactions
Learn About the Difference between a VOID and a
RETURN