
Help System
 |
Help System |
Since there are so many ways to
configure an Attraction, we have developed a set of common examples, to help
“kick-start” your setup. Here we detail how to enter an attraction for a typical
Theme or Amusement Park. This example would also be good for zoos, Museums or
other limitless daily entry attractions..
Let’s say we are an Amusement Park called World of Fun. We are open year round
(weather permitting). Here is how we might go about entering the record for
daily admission to the park:
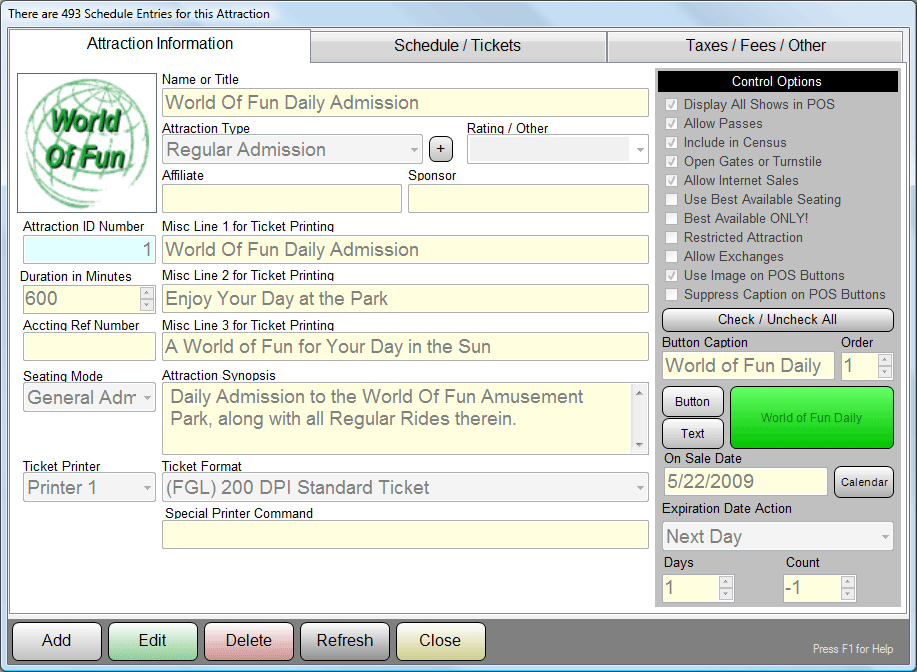
Notice that we have entered the full title of the contest in the Name or Title
field. We have marked this record as a “Regular Admission” attraction. This is a
category made up by the theme park operator. It could have just as easily been
categorized as a “Daily Admission” or “Standard”. The attraction categories are
up to you. The Rating, Sponsor and Affiliate fields were left blank. Aside from
closing time, there is no limit on how long a guest can stay in the park, so a
value of 0 is entered for the Duration field. The Synopsis field describes the
rides and amusements permitted with entry into the park. As is typical for theme
parks, the Seating Mode is set to General Admission Only. We are not issuing any
special looking tickets for these games, so the Ticket Format is set to Reg
Admission. We are using the primary ticket printer (number 1) to print tickets
for this attraction. As would be typical for most Theme Park records, the fields
for Misc Lines 1,2 and 3, as well as the Special Printer Command are left blank.
Since this is a Theme Park, and presumably we would be operating the POS Module
in the Daily Admission Mode, we would also prefer that past showings of the play
DO NOT “disappear” from the POS Screen as they expire. In other words, since
most of our sales will be walk up sales, we do not want the selection for this
attraction to go away after the 10:00AM opening time. As such we will check the
option Display All Shows in the POS Menu.
This Theme Park Operator has decided to honor existing passes for entry into the
park, and as such has checked the Allow Passes option.
Since this attraction represents entry into the Park, the option Include in
Census when Validated is checked.
Like a lot of Theme Parks, this venue uses an automatic turnstile controlled by
a computer, so the option Opens Gate or Unlocks Turnstile is checked.
The POS Button Caption is given a shorter title of simply “World of Fun Daily”,
and has been assigned a background color of light green, with a text color of
dark green.
The On Sale Date is set such that we can begin selling tickets right away, and
it is not a Restricted Attraction, so any operator can sell tickets for it.
Since any ticket would be good for one day only, the Expiration Date Action,
Days and Count are set to Next Day, 1 and 1.
Entering the Schedule:
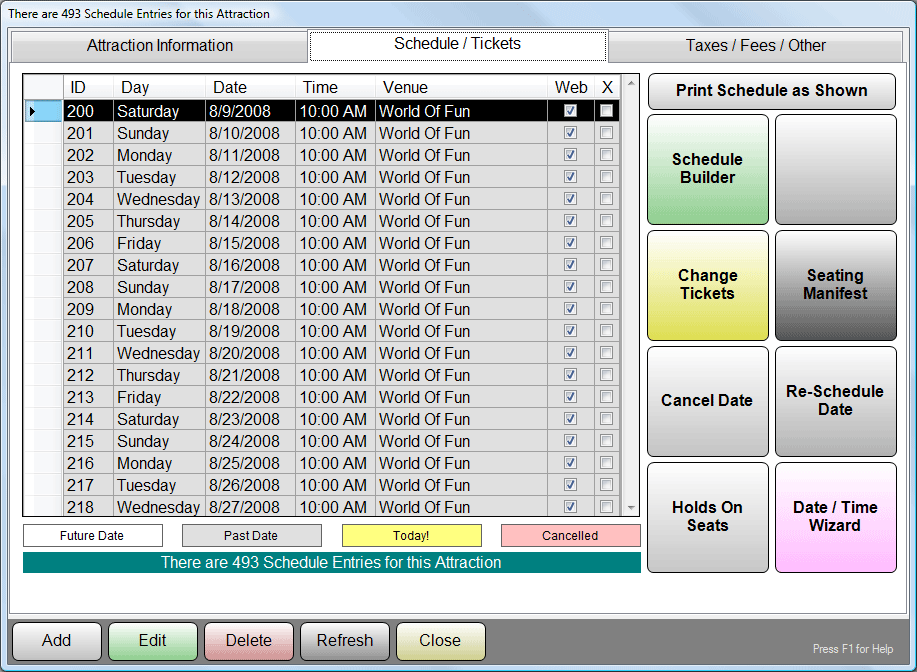
The second tab of the Attraction Entry form is for creating and modifying the
schedule for the Attraction. This example already shows that there are days
scheduled, but let's pretend there aren't any. For Theme Parks, it is
common that some days have special promotions, such as “Balloon Day” or “Every
Kid Gets a Hotdog Day” and what not. Let’s use the following typical pricing
scheme for this example:
ADULT: $27.95
CHILD: $19.95
GROUP: $17.95
COMP: $0.00
You could have different pricing on a different days in accordance with some
special promotion, we are just keeping this example fairly simple. This should
be similar enough to your operation to see how to set up your specific policies.
Let’s get to work…
Begin by clicking on the Schedule Builder Button…
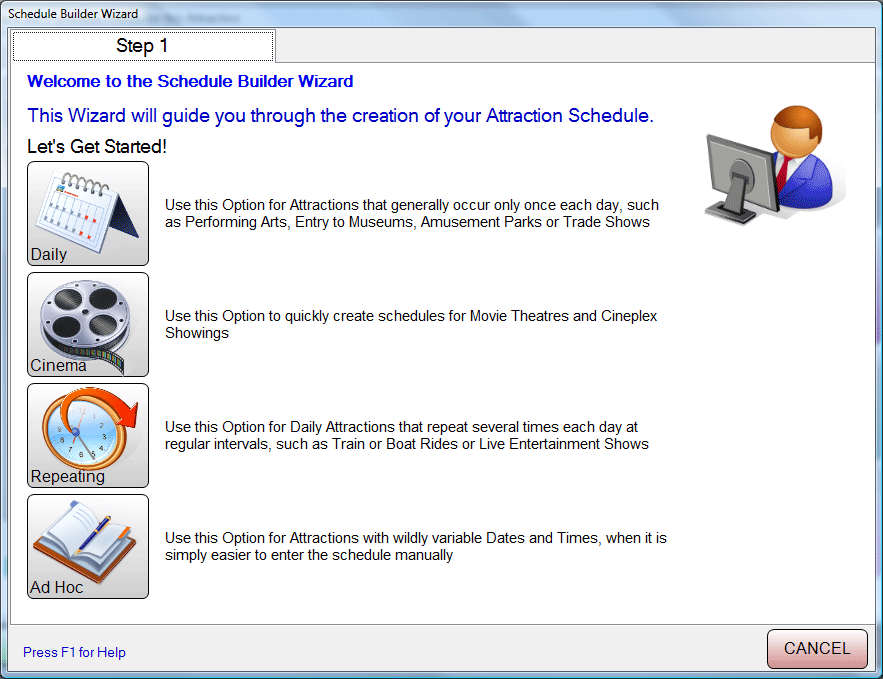
This will bring up the Schedule Builder Selection Screen. Since this is a Daily
Admission attraction, select Daily Admission Schedule Builder…
Since our theme park is open daily, we can build our schedule in a single large
block. Have a look:
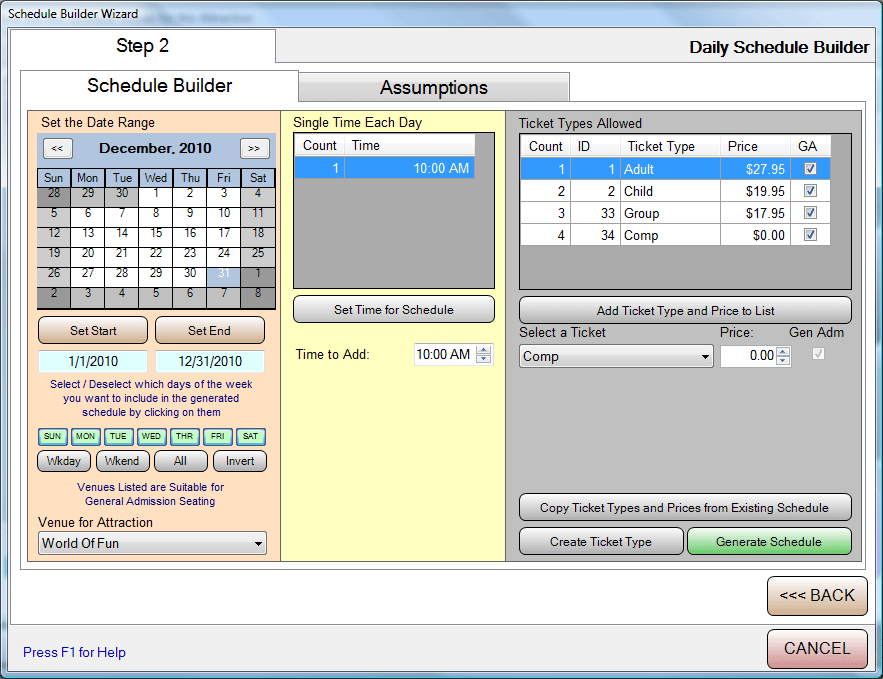
Here we have a block of dates from January 1, 2010 to December 31, 2010. Within
that date range, ALL days are acted on. Notice that all the Day buttons are
GREEN. This all takes place at the World of Fun Park.
On these days, the park opens at 10:00AM.
Finally we add the tickets of ADULT, CHILD, GROUP and COMP, priced as indicated
above. Then we click the GENERATE SCHEDULE button.
Once we have generated the raw schedule, we are going to have to go in and do
some editing on individual records in the schedule, so that we can have more
detailed information on our tickets. You do this by double clicking on any
schedule item displayed in the Attraction Record. As an example we are clicking
on the May 14th entry in the schedule. For our example, this is “All Kids Get a
Free Balloon Day”.
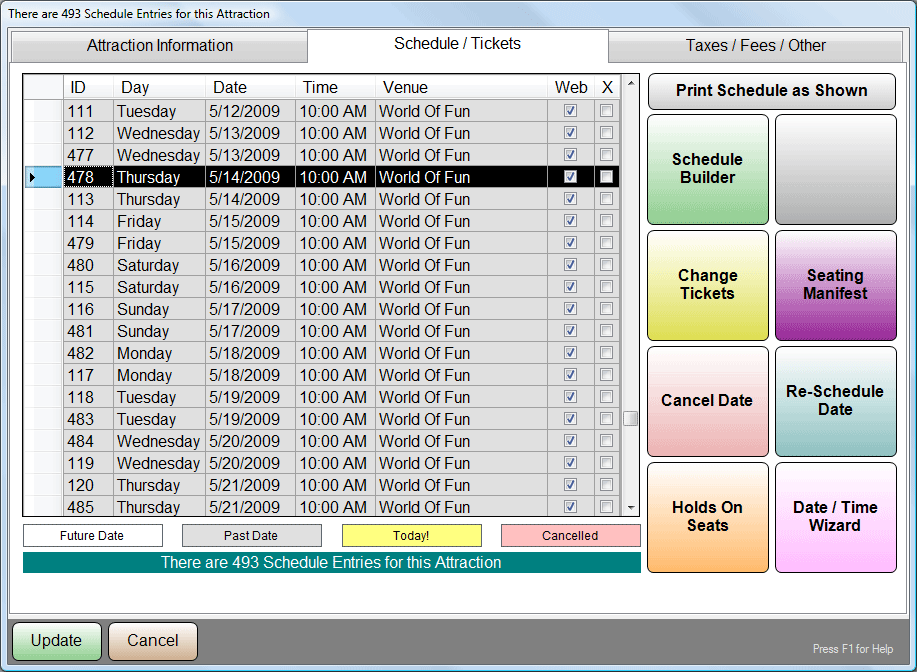
When we double click on the schedule item, the details for that schedule item
pop open. We click EDIT, and adjust the entry for Ticket Line 1. We enter
“BALLOON DAY”. This item will print on our ticket by using the field ShowLine1.
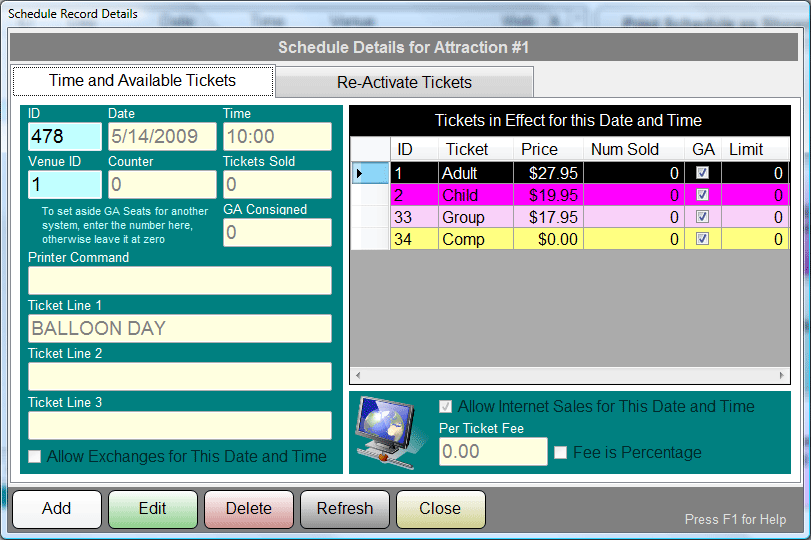
That’s It! We have created a complete Daily Entry schedule for the entire year
of 2010. We would now repeat this procedure for different entry schemes, such as
season passes, adjusting the ticket prices and expiration options accordingly.
See Also:
Attraction Record
Entry
Typical Cineplex (Movie) Attraction
Typical Performing Arts Attraction
Typical Sporting Attraction
Changing Tickets and Prices