
Help System
 |
Help System |
This Report is Generated Using

Customer Listing Reports allow you to see your customer records using a fairly complex selection criteria, derived from a simple step-by-step wizard. You can also re-run a previously saved set of criteria, by selecting it from a pull down list.
|
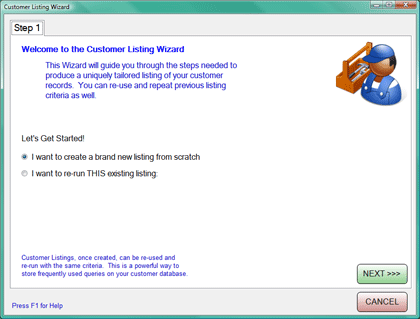
Step 1: Decide if you want to create a new listing with new criteria, or select a previously generated query to re-run. If you want to re-run a query, you will be able to select it from a pull down list of saved customer listing queries. Selecting a previous query will then jump you to step 6 of the process. |
|
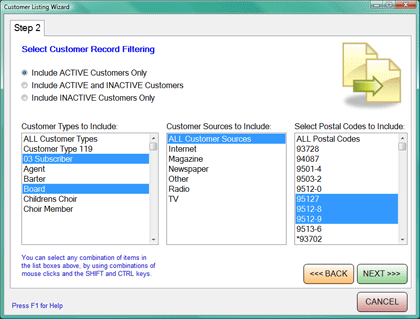
Step 2: Decide if you want to impose any selection criteria that come DIRECTLY from the Customer Record. You can elect to filter by CUSTOMER TYPE, SOURCE or POSTAL CODE. By holding down the CTRL KEY while you mouse click, you can select multiple entries in each list box.
|
|
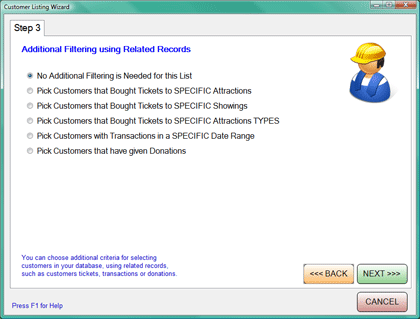
Step 3: Decide if you want to impose any selection criteria that come from records RELATED to your customers. You can choose NO ADDITIONAL FILTERING, which will take you right to Step 5, or finding customers that have attended certain ATTRACTIONS, SHOWINGS or ATTRACTION TYPES. You can also select for customers that have conducted TRANSACTIONS in a specified date range, or customers that have made DONATIONS to various Fundraising Campaigns. Depending upon your selection, Step 4 will vary.
|
|
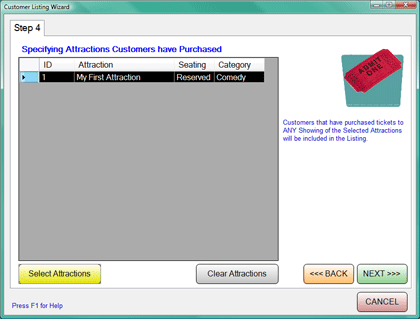
Step 4 (for Attraction
Selection): Decide on which Attractions to base your customer selection. Click on the yellow SELECT ATTRACTIONS button to bring up the Attraction Search Screen. You are allowed to select more than one Attraction here. If you make a mistake, you can click on the CLEAR ATTRACTIONS button.
|
|
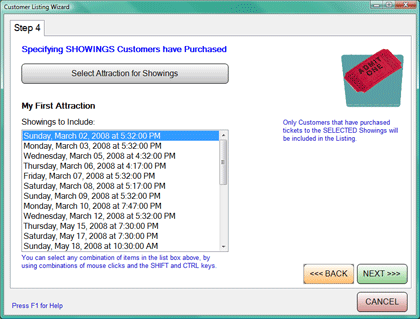
Step 4 (for Showing
Selection): Click the SELECT ATTRACTION FOR SHOWINGS to populate the showing selection list. You are allowed to select only ONE Attraction here. Once the list of SHOWINGS is populated, you may select as many showings as you need for your search. Do this by holding down the CTRL button while clicking with your mouse.
|
|
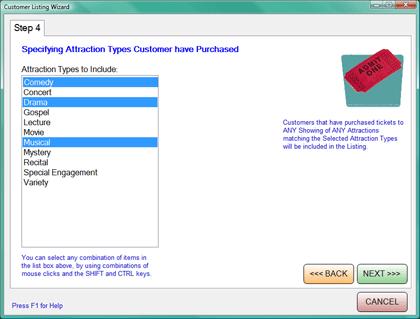
Step 4 (for Attraction Type
Selection): Decide on which Attraction Types to base your customer selection. You are allowed to select more than one Attraction Type here. Do this by holding down the CTRL button while clicking with your mouse.
|
|
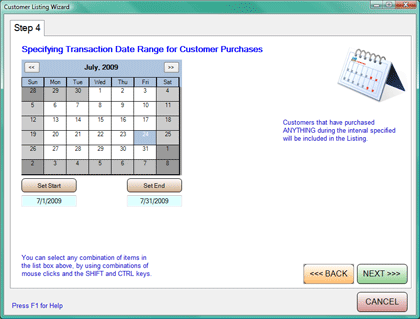
Step 4 (for Transaction Date
Range Selection): Specify a Transaction Date Range for your customer search.
|
|
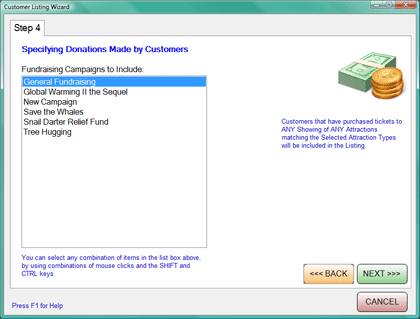
Step 4 (for Donation
Selection): Decide on which Fundraising Campaign Donations to base your customer selection. You are allowed to select more than one Fundraising Campaign here. Do this by holding down the CTRL button while clicking with your mouse.
|
|
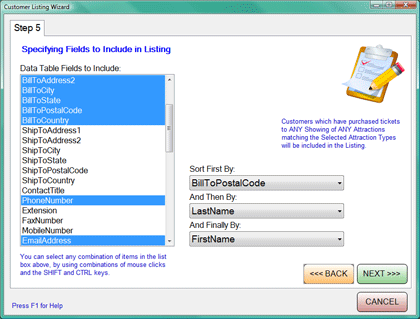
Step 5: Select which fields you are going to output in your query. By default, the program will select the most common fields used for exporting for such things as mailing labels. You can select more than one field by holding down the CTRL button while clicking with your mouse. You have up to three levels of sorting available. The default is the preferred sort for bulk mailing labels.
|
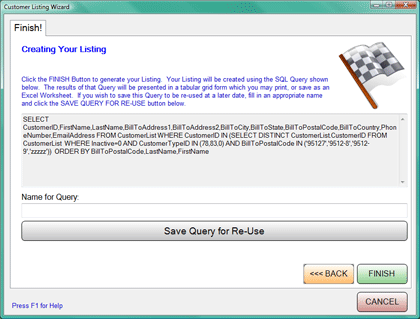 |
Step 6: Your SQL Query will be generated, and displayed in a text window. You can enter a friendly name for the SQL Query, and save it for later use. The program will tack on the prefix of CST- to your name, so it can group them later. To protect novice users, you are not able to EDIT the Query directly. You can edit the saved query file by using NOTEPAD, if you are really intent on editing it by hand. However, if you make manual changes, we cannot guarantee that it will run in a useful manner. Click FINISH to see the results of your query. |
See Also:
Query Results Viewer
Top N Customers
Customers by Type
Membership Expiration
Membership Types
Crystal Report Viewer