
Help System
|
|
Help System |
The Trak Pro Food Service Menu is designed somewhat differently than other POS software menus. With the our Food Service Menu, the actual choices presented to the user during POS operations depend upon such factors as the privileges of the user and what station they are logged into. The program literally rebuilds the POS menu every time someone logs in at a POS station, configuring the visible choices for their security and station options. Additionally, in order to keep the user from being bombarded with a huge matrix of buttons, the Food Service Menu is built along a cascading, top down principle. You begin from the top row of buttons a work downward, where each selection you make presents additional selections, if relevant. This means that the operator is only looking at buttons needed to make decisions on the current item being entered in the POS transaction. Visual clutter is greatly reduced, and operator sensory overload is avoided.
The Food Service Menu is edited one Menu Item at a time. Here is an illustration of a typical Food Menu Item:
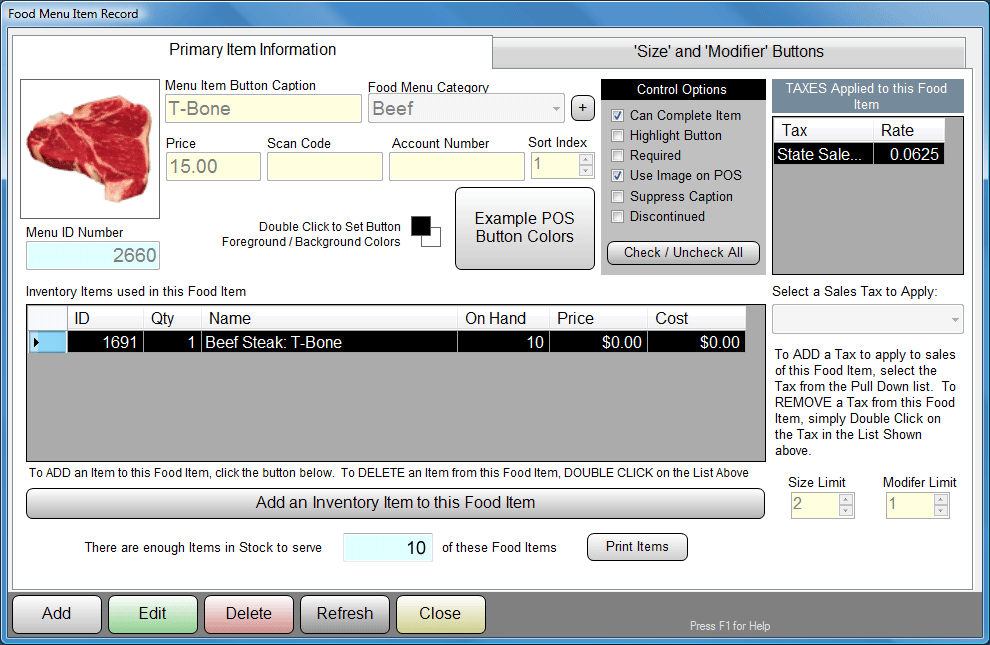
The example above is for a BEEF entree of T-BONE steak. A Food Menu item belongs to a Menu Category that you select or create. You can set an Image and Caption for use on POS Button. If you wish, you may explicitly assign foreground and background colors for each and every button you create individually. If you do not assign a color, the program will simply use the default color for the button level. You may set the default colors for the menu by clicking on the color swatches next to the example POS Button. You can select any applicable Sales Taxes for this item.
Usually, but not always, Food Menu items have Inventory Items associated with them, so that when you sell the Food Item, the appropriate inventory items are deducted from your inventory on hand. You can assign any number of Inventory Items to a Food Menu item button. Click on the ADD AN INVENTORY ITEM button to search through your inventory. To REMOVE an item from the button, double click on it in the list.
The CONTROL OPTION check boxes affect how the Menu Item button behaves, and require some detailed explanation here:
■ Can Complete Item
This is the rule that you will pay attention to the most often, as it that determines whether or not a button can “complete” an item. That is to say it determines whether or not the button provides sufficient information to allow the operator to ADD the item into the customer's shopping cart. Let’s see some simple examples for when a button can “complete” an item:
Say you sell boxes of CANDY at your theater. If your theater is typical, you are most likely going to offer the big “concession size” boxes of things like M&M’s or GOOBERS or such. So, for such menu items, each one can be assigned to a button, given a price, and set to “complete”, as the operator need not give any further information about the item to finish adding it to the transaction.
On the other hand, let’s say you sell SOFT DRINKS at your concession stand. You might offer drinks such as PEPSI or COKE in a variety of sizes. So, for the MENU ITEM buttons, you might assign them labels of PEPSI or COKE, but these buttons cannot yet “complete” an item. The operator still needs to indicate a SIZE for the soft drink, in order to properly assign a price, and any inventory items to pull (such as cups or lids). So, in the SOFT DRINKS category, MENU ITEM buttons cannot complete items, but SIZE buttons can.
In the example above, the T-Bone is technically allowed to complete a sale, since we know the inventory item to pull, and the price to charge. In reality, the operator will want to add additional information for the cooks to tell them how to prepare it, and what sides to go with it.
■ Highlight Button
This is an easy option to explain. Checking this option sets the button background to a light yellow on the POS Screen. You might want to do this to remind operators that you are running low on this item, or to try to "PUSH" this item. Use it for whatever you want to.
■ Required
This option determines whether or not the Food Menu Item MUST be clicked PRIOR to Size and/or Modifier Choices.
■ Use Image on POS
Checking this option will cause the POS Module to display the selected picture on the button for this item.
■ Suppress Caption
Checking this option will cause the POS Module to SKIP PRINTING the button caption on the button for this item. Usually you would do this if you have a picture that is sufficiently clear for your operators to select the item without error.
■ Discontinued
Checking this option indicates that the Food Menu Item is NO LONGER OFFERED for sale. You would check this to REMOVE the button from POS Module displays, when you still want to RETAIN the Menu Item for reporting purposes, or to Re-Activate it later. For example, the Food Menu Item might be a seasonal item, such as FRESH CANTALOUPE. Rather than remove it entirely, when the season has passed, just DISCONTINUE it. Then, next season, just RE-ACTIVATE it.
The SIZE AND MODIFIER BUTTONS tab will take you to a screen that shows a miniature version of the POS Button Menu:
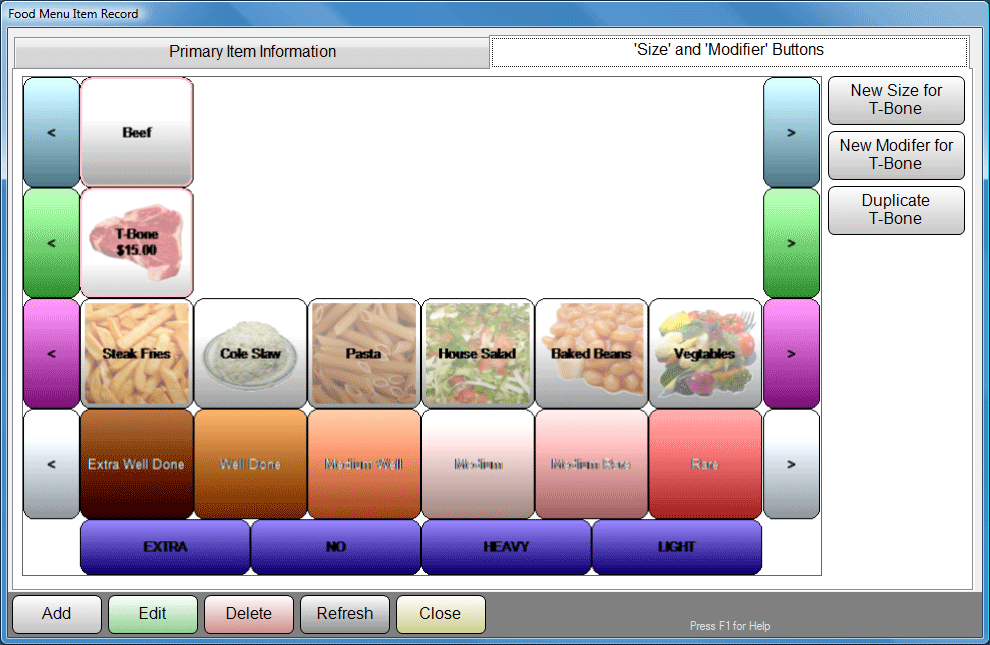
In this example (although it is a little blurry for the help screen, sorry) we see that under the category of BEEF, we are working on the Food Menu Item of T-BONE STEAK. In the "SIZE" level of the item, we have defined SIX (or more) buttons, for STEAK FRIES, COLE SLAW, PASTA, HOUSE SALAD, BAKED BEANS and VEGETABLES. We have even loaded images to help the operator select the dish visually. See, the "SIZE" level really does not have to represent "Sizes". In this example, we have pinched the level to represent "SIDE DISHES". The program really does not care what the buttons represent, but in order to refer to the various levels, we had to call them something. That is why we are stuck calling them the SIZE and MODIFIER levels.
In the MODIFIER level, we have defined SIX (or more) buttons for how to cook the steak (this really is a "modifier"). We have EXTRA WELL DONE, WELL DONE, MEDIUM WELL, MEDIUM, MEDIUM RARE and RARE. We have even defined appropriate colors to help the operator select the "doneness" visually.
On the right hand portion of the panel are Menu Building Action Buttons. These are NOT part of the Food Item Menu, but rather allow you to edit and act upon the buttons IN the Menu.
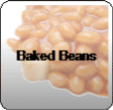 |
Clicking on any Food Menu, Size or Modifier button will change the Action Buttons on the Right. For example, clicking on BAKED BEANS will change the Action Buttons to look like this: |
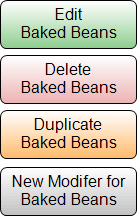 |
Use the Action Buttons to ADD, EDIT, COPY or DELETE various buttons on the menu.
The Food Services Menu Builder contains powerful “Wizards” which will help you jump-start your menu definition. These wizards will not only create buttons and assign sizes and prices, but can also set up inventory items for you as well. For more information on these wizards, click on the topic links below.
See Also:
Food Menu Item Search
Food Menu Categories
Concessions Wizard
Entree Wizard
Pizzeria Wizard