
Help System
|
|
Help System |
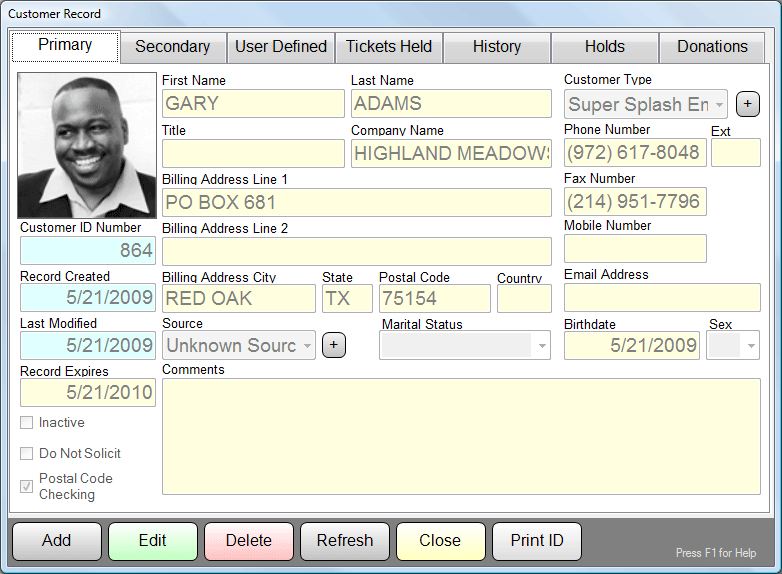
Primary Information about your customer is displayed on the first panel of the Customer Record form. By default, when the record is displayed, all fields will be locked from being edited. This is a precaution to avoid accidental changes to your customer records from stray keystrokes or touch screen jitters. When a field is LOCKED, it is displayed in YELLOW:
A Locked Field:

An Unlocked Field:

To unlock the fields, simply press the green EDIT button More About Database Record Controls.
Customers can be assigned a
PHOTO or other image. More About
Image Options
Customers can be tagged as being ACTIVE or INACTIVE. Inactive customers are excluded from ordinary searches and reports, so if you have customers that you do not want to pester with mailers, or who are inactive for any other reason, you can tag them as such by clicking on the Inactive Checkbox, which will toggle the state of the customer record.
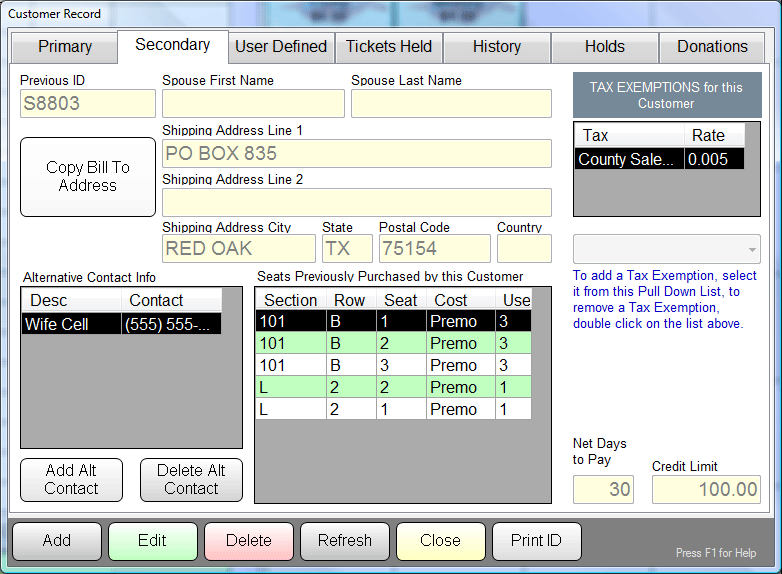
Secondary Information about your customer is displayed on the second panel of the Customer Record form. This is info that you typically would like to have, but don’t necessarily need to see every time you look at a customer. If your customer’s Billing Address and Shipping Address are the same, you can quickly copy the Billing Address by clicking on the Copy Billing Address button.
The field called PREVIOUS ID is a field where you can “tie” the customer record in Tick-It! Trak Pro to some other legacy system in use by your organization. In our example here, the customer “GARY ADAMS from the company called HIGHLAND MEADOWS” has been assigned a Customer ID number of 864. (See the first panel illustration for clarity). Now, in a previous ticketing or accounting system used by the organization, the very same customer had already been assigned an ID of S8803. By entering that ID in the Previous ID field you now have the means to cross reference the two systems. In other words, it is now possible to tell that Tick-It! Trak Pro customer #864 is the same as customer S8803 in the other system.
Any number of alternate contacts can be entered. These are "free form" and can be Cell Phones, Email Addresses, virtually anything you like. In the example above, we have Mr. Adams' wife's cell phone.
You can set the number of days this customer has to pay for "House Account" sales, as well as a credit limit for them.
You can see any seats that this customer has purchased in the past, ordered by the seats most frequently purchased. This will let you try to accommodate your customer's preferences when selecting seats. In the example above, Mr. Adams has purchased In Row B of Section 101 in one venue 3 times, but only once in Section L, Row 2 of another venue.
You can also see and set any tax exemptions for this customer. In the example above, Mr. Adams is exempt from County Sales Tax. Select a tax from the pull down list to make the customer exempt. Double click on a tax in the exemption list to remove it, making the customer subject to the tax.
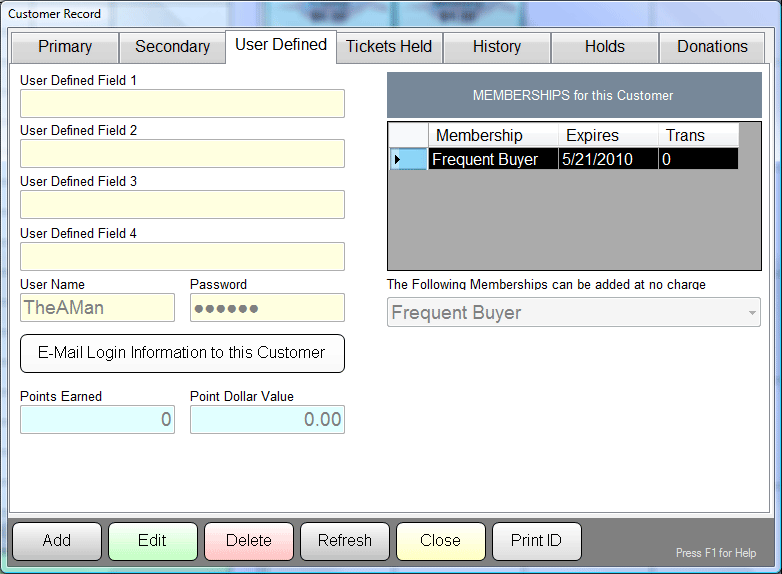
User Defined Information about your customer is displayed on the third panel of the Customer Record form. Here are 4 text fields of length 255, that can be labeled as anything you might need that is special for your organization. The labels are assigned in the ADMIN module.
You can also see any Memberships held by this customer. If you have any FREE Memberships offered, you can select them from the pull down list, otherwise, paid memberships are purchased through the POS Module.
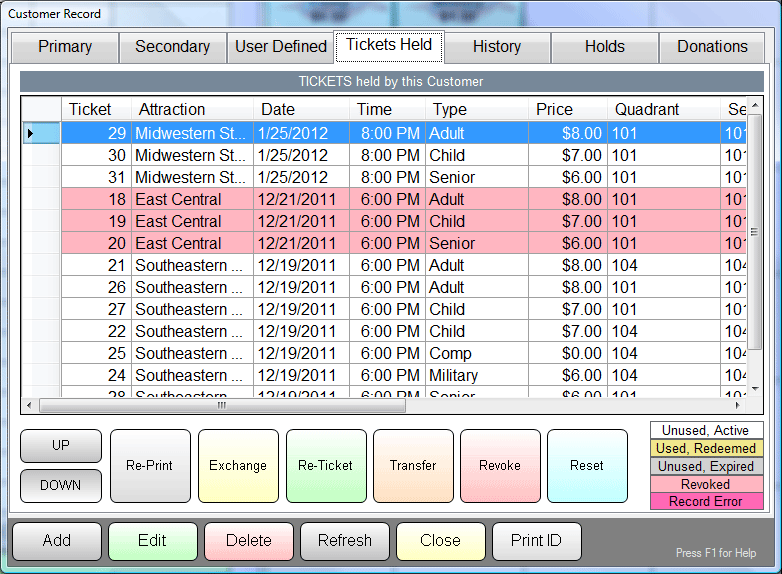
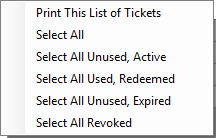
Tickets currently held by your customer… You can see which tickets are still active, unused, redeemed or expired based on the color coding as indicated by the color key. You can select one or more tickets for REPRINTING, if you have sufficient user privileges to do so. Right Clicking on any ticket in the list will produce this Short Cut Menu for your convenience:
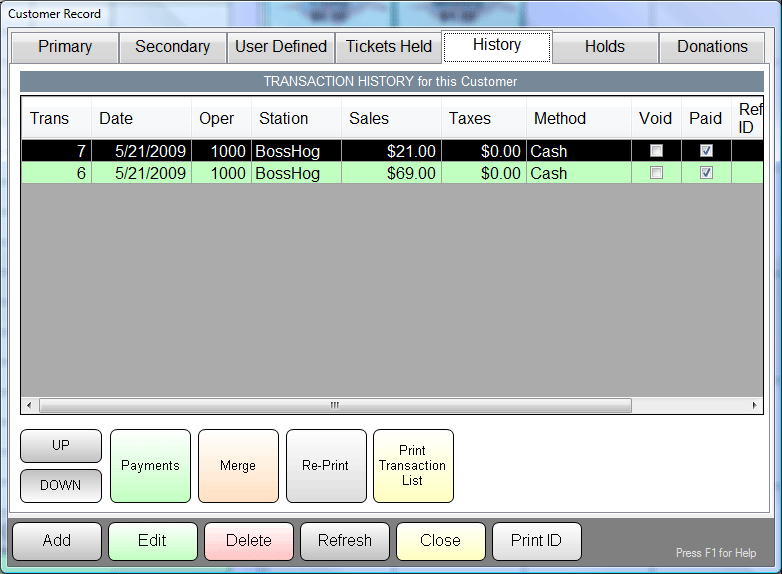
Your customer’s transaction history… From here you will be able to see a list of all the transactions ever conducted by this customer. Double clicking on any transaction will bring up the line item details for that transaction.
You can also make payments on transactions where a balance exists. There are basically two ways to make payments:
Making 1 or More Payments on a SINGLE TRANSACTION
To make 1 or more payments on a Single Transaction, simply click on the transaction line to select it, then click on the PAYMENTS Button. The Record Payments screen will appear. For more information, please see Recording Payments for a Single Transaction
Making a SINGLE PAYMENT on MULTIPLE TRANSACTIONS
When a customer has several open transactions with balances, they may wish to pay off SOME or ALL of their transactions with a single payment (often a credit card). Rather than have you go through the tedium of calling up each transaction and recording and swiping a credit card each time, you can select several transactions to pay at one time. Here’s how:
For EACH transaction you want to record a payment for, enter the payment amount in the PAYMENT column. If the customer is paying the balance, there is a shortcut button in the last column to fill the balance in for you. When you have done this for each of the transactions to receive a payment, click on the PAYMENTS Button. The Record Payments for Multiple Transactions will appear. For more information, please see Making a Single Payment on Multiple Transactions
For ADMIN Use Only:
If you are logged in as the ADMIN (Operator 1000) you can also MERGE several transactions into a single transaction for customer billing convenience. Simply highlight the transactions you wish to combine, and click on the MERGE button, and the Merge Transactions Wizard will appear. For more information, please see Merging Transactions
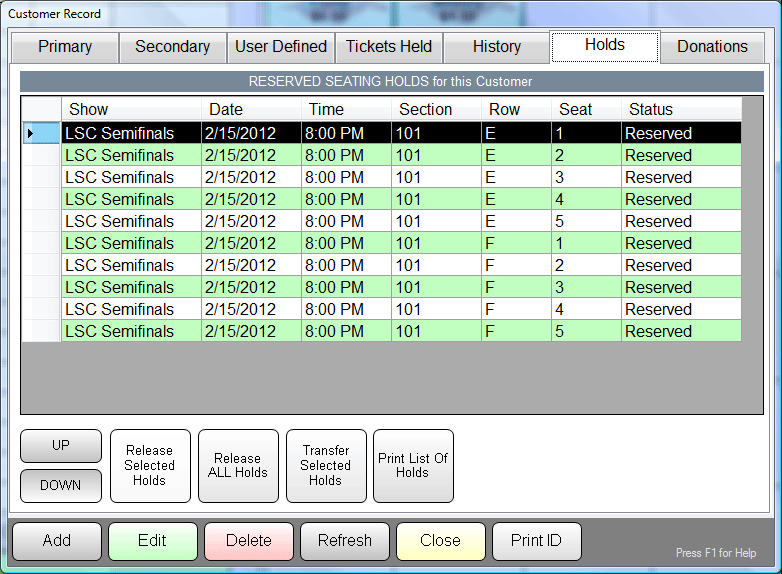
The sixth tab displays any HOLDS that this customer has on reserved seats. Here we can see that Mr. Adams has 10 seats on HOLD for him to pick up later.
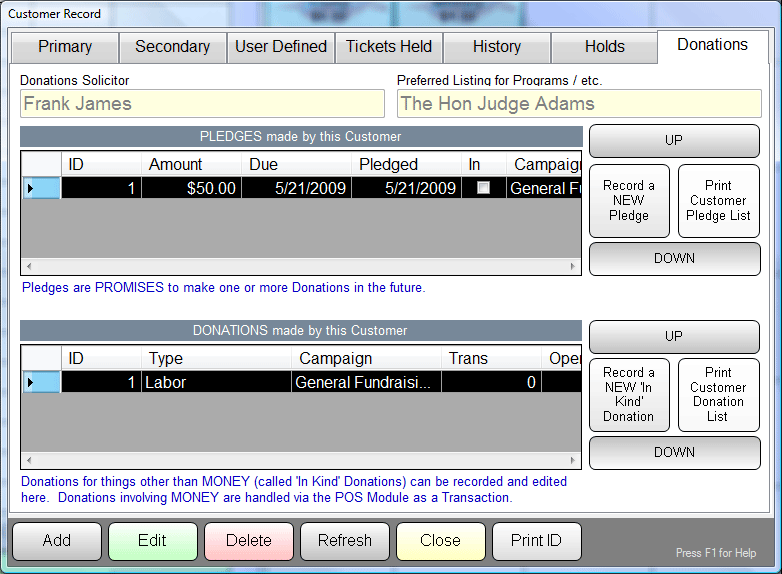
The seventh tab displays any fundraising activity for this customer. The two fields at the top show the Primary Donations Solicitor for this customer (in this case, someone named Frank James) and the preferred way to list this customer for Fundraising Solicitations and Acknowledgements (in this case, "The Hon Judge Adams"). The upper list displays PLEDGES, or PROMISES to donate to specific fundraising campaigns. The lower list displays ACTUAL DONATIONS that the customer has given. New "In Kind" donations can be recorded here, but only for donations that DO NOT involve some form of MONEY. Time, Labor, Materials, etc. For donations involving CASH, CHECK or CREDIT CARDS, they are recorded using the POS MODULE during a transaction.
See Also:
Customer Search
Customer Types
Customer Source
Postal Code Maintenance
Importing Customers from
Tick-It! 2K
Importing Customers
from Center Stage WinTix
Importing Customers
from Choice Ticketing Systems
Importing Customers
from ASCII Files