
Help System
 |
Help System |
Starting with version 3 of Trak Pro, a powerful yet easy to use NEW VENUE WIZARD will help guide you through the creation of new venues for your ticketing system. There are essentially 3 ways that a new venue can be added to your ticketing system:
■ You can create a new venue entirely from scratch
■ You can duplicate a venue from your current Trak Pro database
■ You can import a venue from another Trak Pro database
The first step in the new venue wizard is shown below:
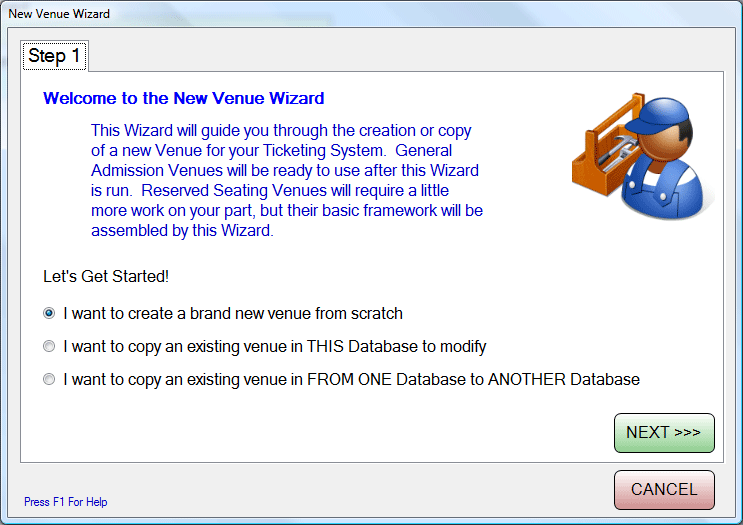
Copying an existing venue is really easy, so we will concentrate on the steps needed to build a new venue from scratch. Select the first option as shown above and click NEXT. No matter what the seating arrangement for your venue is, you will be prompted to enter a name and address for the venue, as well as select a venue type:
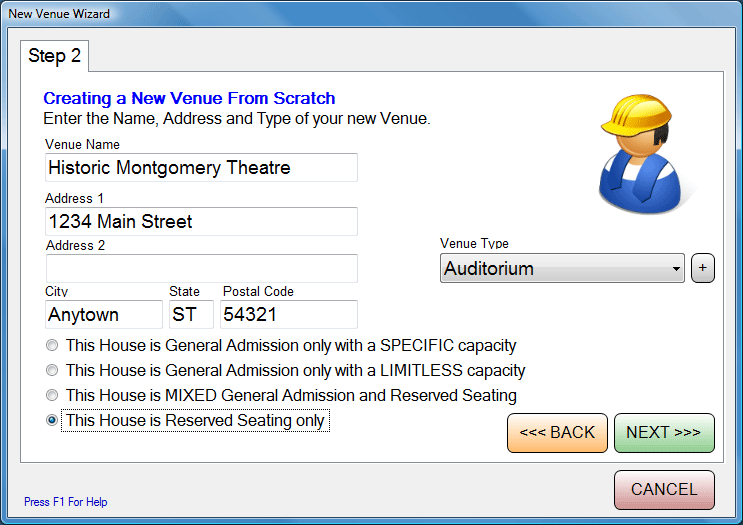
You will have to specify one of four possible seating arrangements for your venue. They are:
■ General
Admission with a SPECIFIC Capacity
This is ideal for movie cinemas, busses or trains or any
place of limited capacity.
■ General
Admission with a LIMITLESS Capacity
This is ideal for places like Amusement Parks, Zoos or other
facility where essentially any number of tickets can be sold.
■ MIXED
General Admission and Reserved Seating
This is a good choice for sporting venues with both bleacher
and box seats, or large outdoor amphitheatres with reserved and lawn seating.
■ Reserved
Seating only
This is ideal for performing arts theatres or any other place
that has specifically assigned seating.
In the example above, the Historic Montgomery Theatre is being set up as a RESERVED SEATING ONLY venue. Click NEXT.
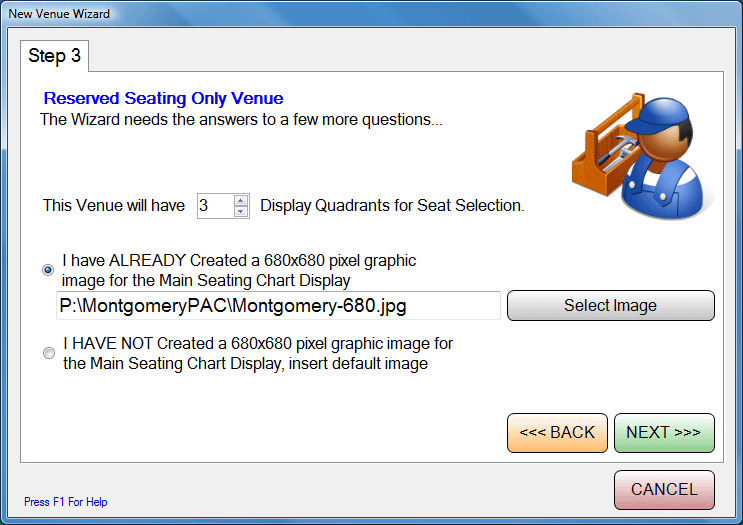
Reserved seating Venues REQUIRE a GRAPHIC OVERVIEW image, and AT LEAST ONE DISPLAY QUADRANT. Graphic overviews for use in-house with the POS Module are expected to be 680 x 680 pixels in size. A smaller image is used for web internet ticketing, and it is expected to be 340 x 340 pixels in size. If you have not already created a Graphic Overview for your venue, the program will insert a default image until you get a chance to fill it in properly. In the example above, the user has selected to generate 3 display quadrants for displaying seats, and has selected a JPG file that contains a graphic overview. Click NEXT when these options are set:
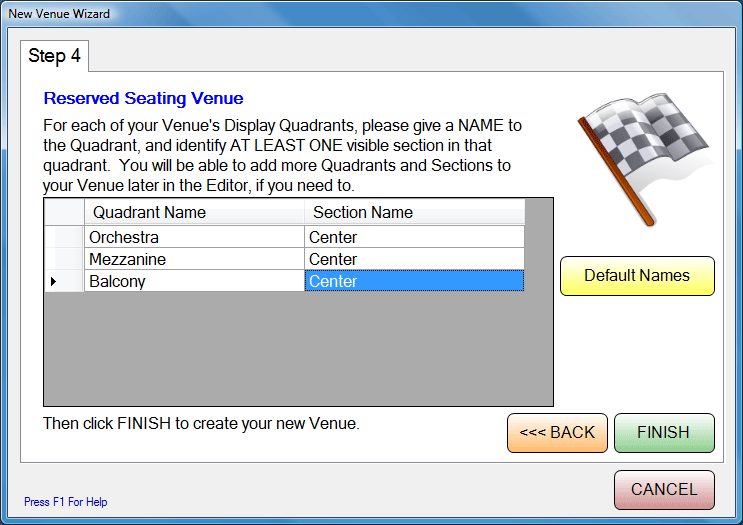
Each Display Quadrant REQUIRES AT LEAST ONE SECTION. Here the operator is naming the three display quadrants, and instructing the wizard to create a section called CENTER. No doubt the operator will later create sections such as RIGHT and LEFT when completing the venue. Click FINISH to build your venue's initial structure. When completed, you will be prompted as follows:
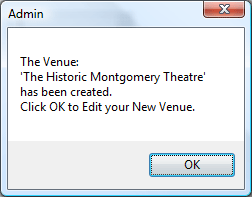
After clicking OK, you will be taken to the Venue Builder to finish putting in seats, shapes and 3D objects into your new venue.
See Also:
Defining a Typical
Theme Park Venue
Defining a Typical Movie Theater Venue
Defining a Typical Live Theater Venue
Defining a Typical Sports Arena Venue
Venue Builder
Seating Diagram Graphical Overviews
Seating Display
Quadrants
Venue Browser
Venue Types
Venue Search
Importing a Venue from
Tick-It! 97/2K
Importing a Venue from Center Stage WinTix